
I’ve just made a video on this topic, so if you’d like to learn about my night photography settings, you can watch the below video – or if not, just continue reading.
I do 90% of my street photography at night and without a tripod. A question I seem to get asked quite often by beginner and intermediate photographers is “How do you manage to take such clear photos at night with no noise or motion blur?”. Don’t worry, it’s a lot simpler than it may seem.
First, it’s important to note that major cities aren’t often all that dark at night, so this makes clear photos at night seem more impressive than they really are. Especially in places like Mong Kok in Hong Kong, some areas are just as bright if not brighter than during the day. But even if we ignore those situations, there are a few simple steps to taking clearer photos at night.
1. Shoot wide open
This means using the fastest aperture your lens offers, which correlates to the smallest F-stop number. Shooting in full auto mode during the night is usually a mistake. Furthermore, a lot of beginner level photography courses instruct you not to stop your F stop too low as you’ll lose sharpness. But the F stop is the first thing you should drop in order to take clearer and less noisy photos at night, as it is almost always going to result in better quality photos overall as opposed to raising your ISO.
2. Shoot RAW
Maybe this should have been step number 1 – you need the highest dynamic range your camera can offer, which means you basically have to shoot RAW at night. Which brings us to our next point…
3. Shoot for the edit
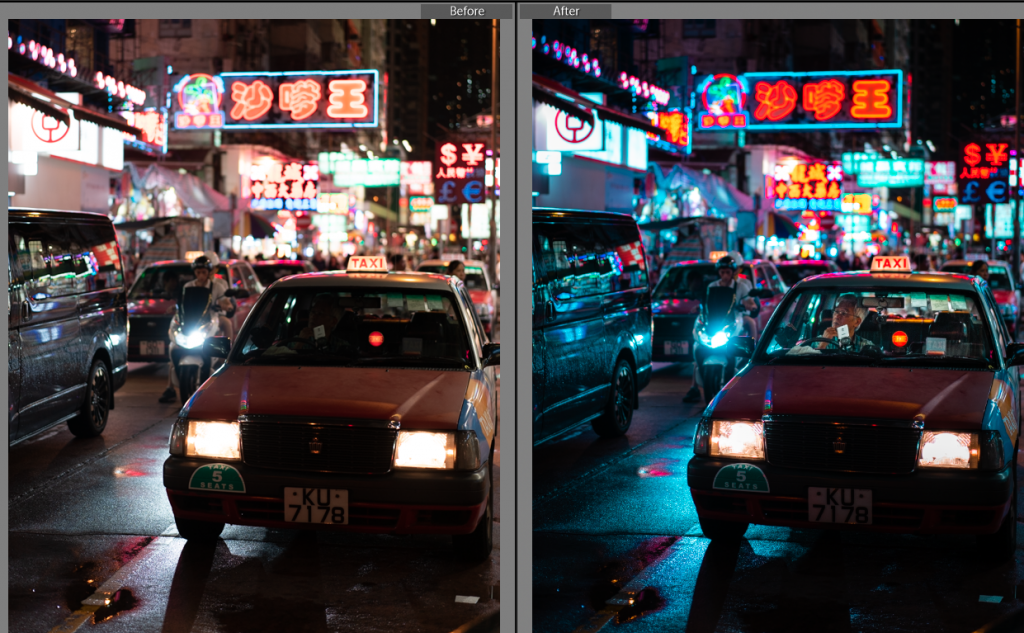
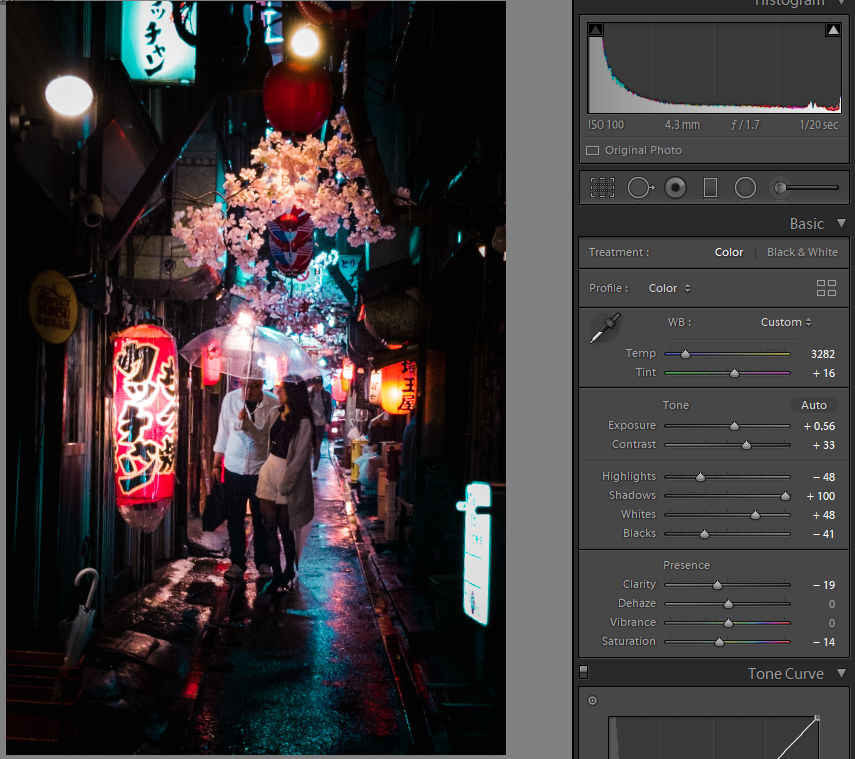
The clearest example I could find
One of my pet peeves is when people ask to see the original photo when we’re talking about something like night time street photography, then accuse you of editing it… Because in order to take optimal photos at night, you should be aiming to shoot the easiest-to-edit RAW file that preserves the most amount of clear data, instead of focusing on shooting a more realistic perfect exposure to begin with. RAW files aren’t even meant to be ready photographs, they’re just a starting point for your edit, which you can later form into whatever you like in post.
At night, shooting for the edit often means preserving the highlights, which means underexposing by about half to 1 full stop. Most modern cameras preserve shadows much better than they do highlights, but it’s important to learn the limits of your camera and experiment. Shooting for the edit allows you more flexibility in the editing process, as you’ll be able to pull up the shadows or exposure while still revealing some highlight details as well.
4. Use the lowest native ISO possible
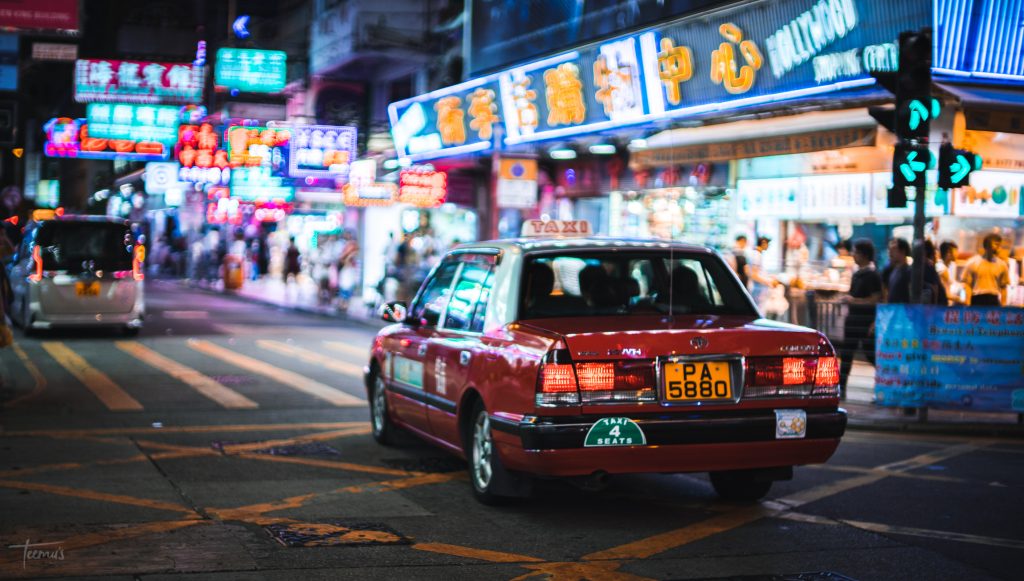
This is quite an extreme example of a nighttime shot at ISO 200, f0.95, 1/640th s. A scene so bright I actually had to use an unnecessarily fast shutter speed.
Most of night shooting actually comes down to prioritizing low ISOs, and the less advanced your camera, the more important this generally becomes. The main aim of all these other points is to make it possible to keep your cameras ISO number as low as possible. This minimizes noise, making the photos clear. But don’t go too low beyond the native ISO point – most cameras allow you to “extend” your ISO lower past the native point, which offers no noise performance benefit. And don’t drop the ISO too low to the point where your exposure becomes more than 1 stop underexposed, or you will lose critical shadow detail.
5. Get some prime lenses
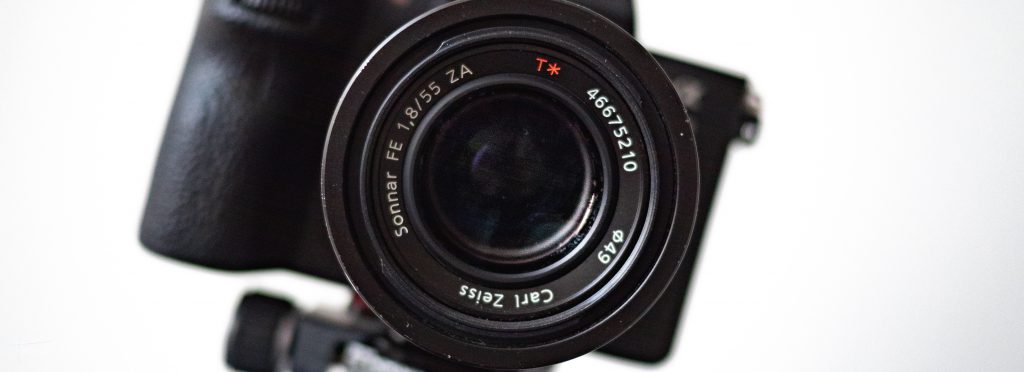
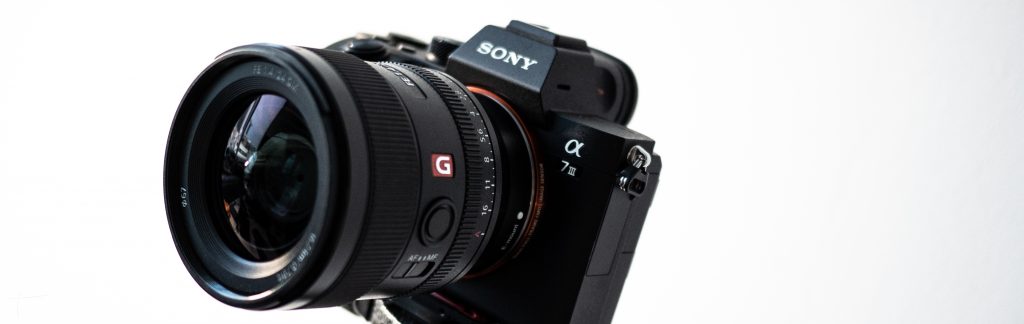
My favorite prime for the Sony system, 55mm f1.8
Prime lenses are lenses with only one standard focal length, meaning there’s no zoom. In return, you get a faster aperture, which means your lens lets in more light, making it better at night. In addition, prime lenses are optimized just for that one focal length, so they’re usually sharper wide open than a equivalent zoom. Even if they’re not, they’d be either cheaper or lighter than their zoom counterparts.
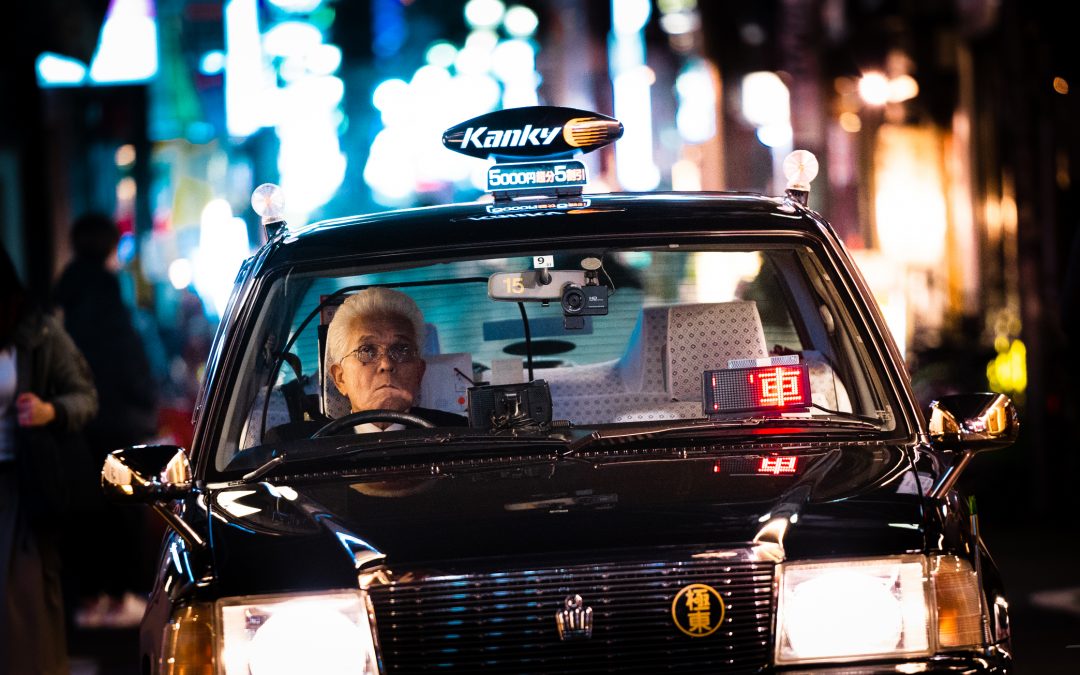
While it’s true that shooting wide open results in a thinner depth of field, another factor is distance from subject. If you’re not right next to your subject, shooting at f1.8 for example is not going to significantly blur much of the scene at all. (If you wanted bokeh while still standing 10 feet away from your subject, you’d need something like a 50mm f0.95, which is what the earlier taxi photo was shot with.)
6. Figure out the optimal shutter speed
You don’t want to use a shutter speed that is too fast, as that quickly raises your ISO to a point where a lot of noise is present. If your camera has internal body stabilization (IBIS), this is a huge help at night. If people are mostly not moving or just loitering around, you should be able to get usable shots as low as 1/50th of a second (even slower if they’re totally still or very slow and you have good IBIS). A good tip is, the lower you drop your shutter speed, the more shots you should take of the same scene just to make sure your hands didn’t shake too much.
But even IBIS or a tripod obviously doesn’t stop motion blur if your subjects are moving too fast. For walking speed subject with you standing still, I use 1/100th – 1/160th s. If I’m also walking while shooting i.e. not stopping for every shot, I go to 1/250th s or a bit faster. Typically, if your subject is moving directly towards or away from you, there isn’t as much perceived movement as compared to if they were moving laterally. Determining the optimal shutter speed takes some practice and experimenting, but it’s a key part of shooting sharp photos at night. Even with limited equipment, if you can catch a moment where people don’t move that much and you have steady hands, it’s possible to get somewhat sharp night time photos. Here’s an example of a photo I took on my phone (*Samsung Note8) :
This is a phone with great stabilization, and the subjects were walking towards me, which allowed me to use 1/20th s on full manual. I kept the ISO at 100 since phone’s ISO performance is usually atrocious, although maybe I should have gone for ISO200 to eliminate the slight motion blur. Finally, this is shot in RAW with the full intention to edit it later. Click here for an editing tutorial.
*Even though this isn’t a cheap phone, it’s still very lacking in performance if compared to any old used entry level DSLR when talking about still photographs.
But if your equipment is lacking, your success rate goes down quite drastically no matter what. Photographers always like to spout a doctrine of “the camera doesn’t matter”, perhaps because that makes them seem more skilled and inflates their ego – but the fact is, during the night especially, the gear you use makes a big difference. It still doesn’t necessarily mean you have to spend a fortune though, as long as you know which features to look for in a camera.
If night shooting is something you’re primarily interested in, I’d strongly suggest prioritizing IBIS when choosing your camera. There are lots of mid-range cameras that leave out IBIS in exchange for some other features, so just because a camera costs $1000 or above doesn’t automatically mean that it is best suited for night time photography. Another thing that helps is a bigger sensor, so go for full frame if you can afford it. But the biggest bang-for-your-buck improvement definitely comes from prime lenses. Changing your f3.5-f5.6 kit lens even for a standard $200 nifty-fifty 50mm f1.8 lens will drastically improve the potential of your night photography, even on an entry level DSLR!
If you’re interested in my gear, I wrote all about it here.
Thanks for reading, I hope it was helpful! If you want to keep in touch, you can find me on Instagram as @teemu.jpeg or if you wish to get my Lightroom Presets for night photography, you can click here.