
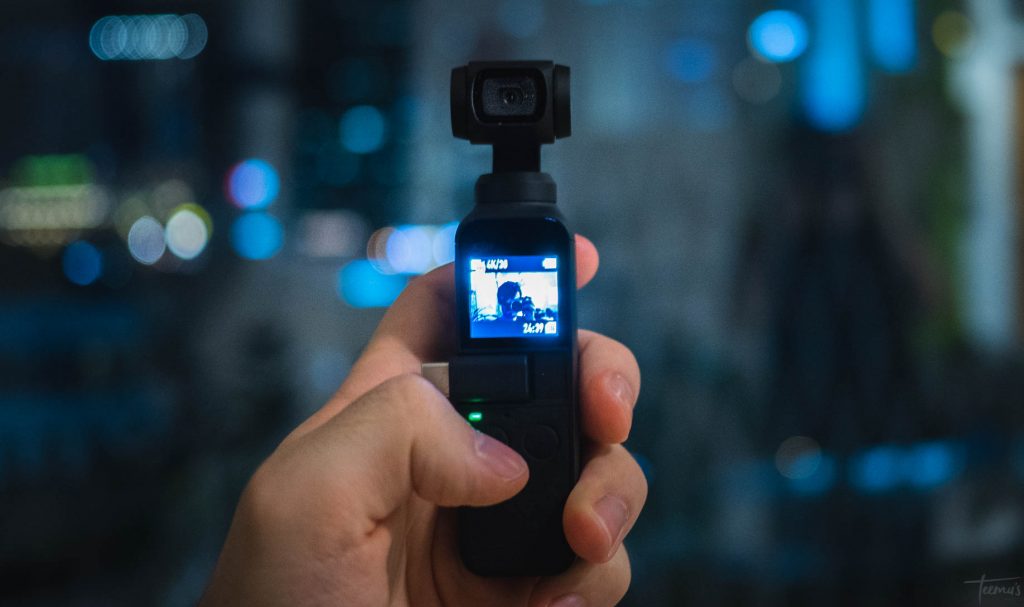
The DJI Osmo Pocket is one of my favorite pieces of gear that I’ve purchased within the past few years. It’s perfect for creating casual videos without breaking your back from carrying heavy gimbal or stabilization systems. But what surprised me was just how great the video quality from this tiny camera could be, even at night. As long as it isn’t pitch black and you’re in a city, the Osmo Pocket does a pretty good job at night as well – but you can’t run it on auto settings for this.
The small size of the camera is obviously a selling point, but in order to get good shots, I usually at least attach it to my phone so that I can see things from a much bigger screen.
Example Osmo Pocket low light footage
Here are some graded samples of footage using the Osmo Pocket at night in Tokyo with the settings I’ve described below.
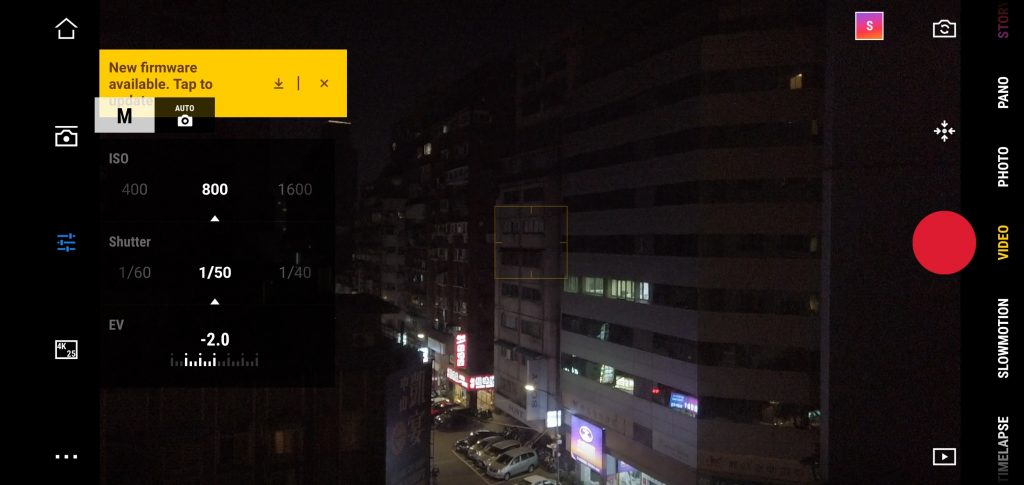
ISO setting for Osmo Pocket night footage : 800 or lower
Small cameras don’t usually have the greatest low light performance, and this camera is no exception. However, the low light performance is comparable to micro four thirds night time performance, such as the Olympus em10 that I used to own, which is impressive in it’s own right. Still, you have to limit your ISO not to go too high, or the grain will be too obvious. Generally, I try to keep my ISO at 800 or below, the highest I would go is 1600 but things start to get questionable at that point. I always keep ISO on manual at night time. If it’s too dark for ISO 800/1600 to be usable footage, I might even sacrifice shutter speed before increasing ISO even further, and the limit my movements to be slower – depending on the scene you’re recording, this can look acceptable.
Picture Profile
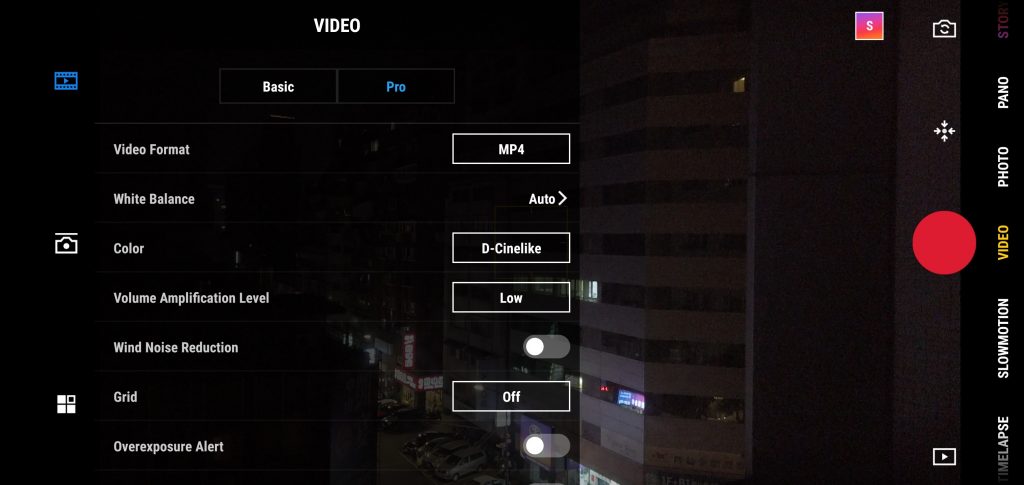
The addition of Cinelike-D made the Osmo Pocket a much better low light camera. The default profile has very high contrast, which buries shadows and blows out highlights too easily during the night, but D-Cinelike fixes this immediately. It adds some degree of noise, but the increased dynamic range more than makes up for it, because videos shot with similar ISOs during the night actually look more lit with D-Cinelike as compared to the default profile.
I’ve shot everything up till now in Fine instead of Superfine. I saw some reports saying superfine is not beneficial in any way due to the way it’s coded, even though its supposed to be higher bitrate. It also leads to overheating issues and isn’t available for 50/60fps. But this might have changed with the firmware updates, so full disclosure, I’ve yet to personally test this.
What if ISO 800 isn’t enough?
So to sum up, in order to get ideal footage from the Osmo Pocket during nighttime, I keep my ISO as low as possible, increasing it to 800 at the most. If slowmotion isn’t needed, I’d shoot at 1/50th s at 24/25fps (depending on your location in the world to avoid flicker). Using D-Cinelike picture profile. In a case where these exposure settings are still too underexposed however, there are a few options available.
- Using lighting gear – in a controlled environment with a model/actor/friend, this is the obvious choice
- Dropping the shutter speed to 1/25th, walking half speed, then speeding up the footage by 200%. A protip if you don’t have people moving too noticeably.
- Last resort – going to ISO 1600+ – this will kind of expose this small camera for what it is, but in a pinch this is still workable if you use a lot of noise reduction in post and/or only show the footage on a small screen – or obviously, if the content is there not to look professional but just to provide context.
If you are new to making videos, I also wrote an entry level videography guide for those who already have some photography knowledge.
You can check the latest prices for the Osmo Pocket on Amazon here.
Read more about which gear I use here.